Goodman Furnace Troubleshooting Manual: A Comprehensive Guide
This manual provides detailed guidance for diagnosing and resolving common issues with Goodman furnaces, ensuring efficient heating and extending system lifespan.
Explore essential maintenance tips, error code interpretations, and replacement part resources, empowering both DIY enthusiasts and professionals.
From pressure switch problems to blower motor failures, this guide offers step-by-step instructions for effective troubleshooting and repair.
Understanding Your Goodman Furnace
Goodman furnaces are renowned for their reliability and efficiency, but even the best systems require occasional attention. Familiarizing yourself with your furnace’s core components is the first step towards effective troubleshooting.
Key elements include the burner assembly, responsible for generating heat; the blower motor, which circulates warm air; the heat exchanger, transferring heat safely; the igniter, initiating combustion; and the pressure switch, ensuring safe operation.
Understanding the function of each part, alongside the role of the thermostat and control board, will significantly aid in pinpointing the source of any heating issues. Regularly reviewing the official Goodman documentation specific to your model number is also highly recommended for detailed schematics and operational insights.
Knowing your furnace’s layout and components empowers you to perform basic inspections and identify potential problems before they escalate.
Safety Precautions Before Troubleshooting
Prioritizing safety is paramount when working with gas furnaces. Always disconnect the power supply at the breaker box before commencing any inspection or repair work. Turn off the gas supply to the furnace to prevent potential leaks or explosions.
Never attempt repairs if you smell gas; immediately evacuate the premises and contact your gas company. Exercise caution when handling electrical components, as they can carry dangerous voltages. Wear appropriate safety gear, including gloves and eye protection.
If you are uncomfortable or lack experience, it’s best to consult a qualified HVAC technician. Incorrect repairs can lead to hazardous situations, including carbon monoxide poisoning. Always double-check your work and ensure all connections are secure before restoring power and gas.
Common Goodman Furnace Problems
Goodman furnaces, like all heating systems, can experience a range of issues. Frequent problems include furnaces starting but not staying on, often linked to pressure switch malfunctions or flame sensor issues. Another common concern is a furnace failing to ignite, potentially due to gas supply problems or a faulty igniter.
Blower motor failures, indicated by a lack of airflow, can stem from capacitor issues or a defective motor itself. Thermostat malfunctions, including incorrect settings or wiring problems, also frequently disrupt operation. Error codes displayed on the furnace provide valuable clues to the underlying problem.
Regular maintenance can prevent many of these issues, but understanding these common problems is crucial for effective troubleshooting.
Problem 1: Furnace Starts But Doesn’t Stay On
A Goodman furnace that ignites but quickly shuts down typically indicates a safety system interruption. This is frequently caused by issues with the pressure switch, which verifies proper draft and exhaust venting. A faulty pressure switch prevents sustained operation, as the furnace prioritizes safety.
Experienced technicians often suggest temporarily bypassing the pressure switch – strictly for diagnostic purposes – to determine if it’s the root cause. However, this should only be done after the draft inducer motor has started, and is not a permanent fix. Other potential causes include a weak flame signal or a failing gas valve.
Thorough investigation is key to pinpointing the exact reason for the shutdown.
Possible Cause: Pressure Switch Issues
The pressure switch is a critical safety component in your Goodman furnace, monitoring the draft created by the inducer motor and ensuring safe exhaust of combustion gases. A malfunctioning pressure switch often prevents the furnace from continuing its heating cycle, causing it to start and then quickly shut off.
Common issues include a blocked or damaged vent pipe, restricting airflow and preventing the switch from registering adequate draft. A faulty switch itself, or a wiring problem, can also be to blame. Debris accumulation within the switch housing can also cause inaccurate readings.
Proper diagnosis requires careful inspection of the venting system and electrical connections.
Testing the Pressure Switch
Before testing, ensure the furnace is de-energized for safety. Locate the pressure switch, typically near the inducer motor, and disconnect the wires. Using a multimeter set to continuity, test the switch terminals. With no pressure applied, the switch should show an open circuit (no continuity).
Apply gentle suction to the switch’s sensing port – you can use a hand-held vacuum pump if available. The switch should click and display continuity, indicating it’s functioning correctly. If it doesn’t, the switch is likely faulty and needs replacement.
Carefully reconnect the wires, ensuring proper connections. Remember to bypass the switch only for diagnostic purposes, never as a permanent fix.
Bypassing the Pressure Switch (For Diagnostic Purposes Only)
Caution: Bypassing the pressure switch is strictly for troubleshooting and should never be a permanent solution. It disables a critical safety feature. Locate the pressure switch wires and carefully disconnect them. Using a short length of wire, jumper the terminals together, effectively telling the furnace the pressure is present.
Ensure the draft inducer motor has started before attempting this. If the furnace now operates normally, the pressure switch is likely faulty. However, investigate the cause of the pressure issue – a blocked vent pipe is a common culprit.
Immediately remove the jumper wire once the diagnosis is complete and restore the system to its original, safe configuration.
Problem 2: No Heat – Furnace Won’t Ignite
A furnace failing to ignite presents a common heating challenge. Initial checks should focus on the gas supply – verify the gas valve is open and other gas appliances are functioning. Inspect the igniter; a visibly cracked or damaged igniter requires replacement. Listen for a clicking sound during the ignition sequence; absence suggests an igniter issue.
The flame sensor is crucial; a dirty sensor can prevent ignition. Carefully clean the flame sensor with fine steel wool. Evaluate the gas valve itself, though this often requires professional assessment. Always prioritize safety and disconnect power before any inspection.
Checking the Gas Supply
Before delving into complex diagnostics, confirm adequate gas supply; Begin by verifying the main gas shut-off valve is fully open. Check other gas appliances – stove, water heater – to ensure gas service to the house isn’t interrupted. If other appliances also lack gas, contact your gas company immediately.
Inspect the gas valve specifically for the furnace; it should be in the ‘on’ position. Look for any visible damage to the gas line or connections; Never attempt to repair gas lines yourself; this is a job for a qualified professional. Smell for gas – if detected, evacuate and call the gas company.
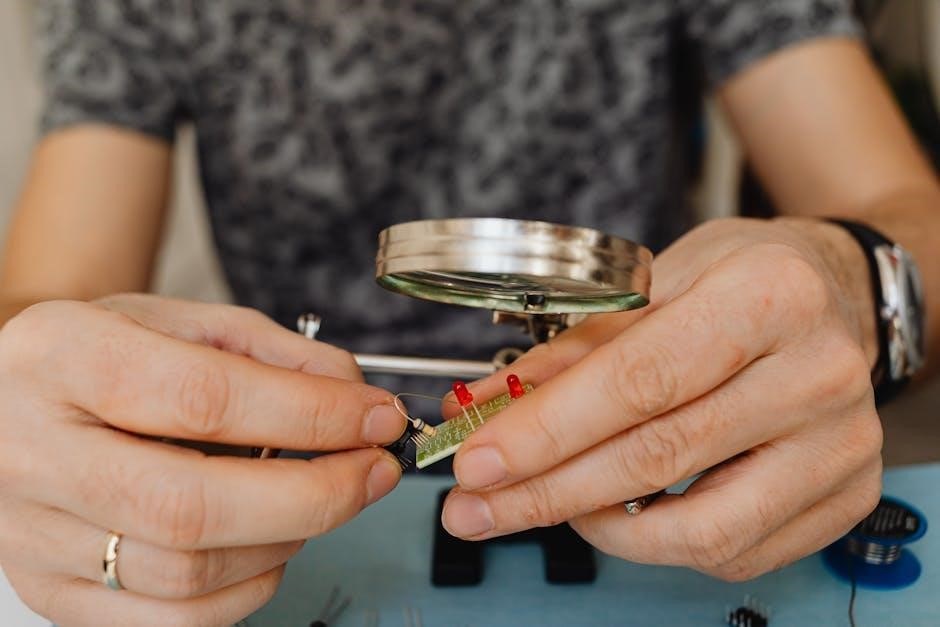
Inspecting the Igniter
A faulty igniter prevents the furnace from heating. Visually inspect the igniter for cracks or damage; a glowing igniter indicates functionality, but a broken one requires replacement. Carefully access the igniter – disconnect power first! – and examine its condition.
Use a multimeter to test the igniter’s resistance. A reading outside the manufacturer’s specifications (consult your furnace’s documentation) confirms a faulty igniter. Be extremely cautious when handling the igniter, as it’s a fragile component. If unsure about testing, consult a qualified HVAC technician. Replacing the igniter is often a straightforward repair, restoring heat quickly.
Evaluating the Flame Sensor
The flame sensor is crucial for safety, confirming the presence of a flame to allow continued gas flow. A dirty or faulty sensor can cause the furnace to shut down prematurely. Carefully remove the flame sensor – after disconnecting power – and visually inspect it for soot or corrosion.
Gently clean the sensor with fine steel wool or sandpaper to remove any buildup. Reinstall the sensor and test the furnace. If the problem persists, use a multimeter to check for continuity; a lack of continuity indicates a faulty sensor needing replacement. Proper flame sensor function is vital for safe and efficient furnace operation.
Problem 3: Blower Motor Not Working
A non-functioning blower motor prevents warm air distribution, even if the furnace is generating heat. Initial checks should include verifying power supply to the motor and ensuring the furnace door switch is engaged. Often, the issue stems from a failed blower motor capacitor, a common point of failure.
Visually inspect the capacitor for bulging or leaking; these are clear indicators of failure. Testing the capacitor with a multimeter is recommended to confirm its condition. If the capacitor is good, proceed to test the blower motor itself for continuity. A faulty motor requires replacement, while a bad capacitor is a simpler, less expensive fix.
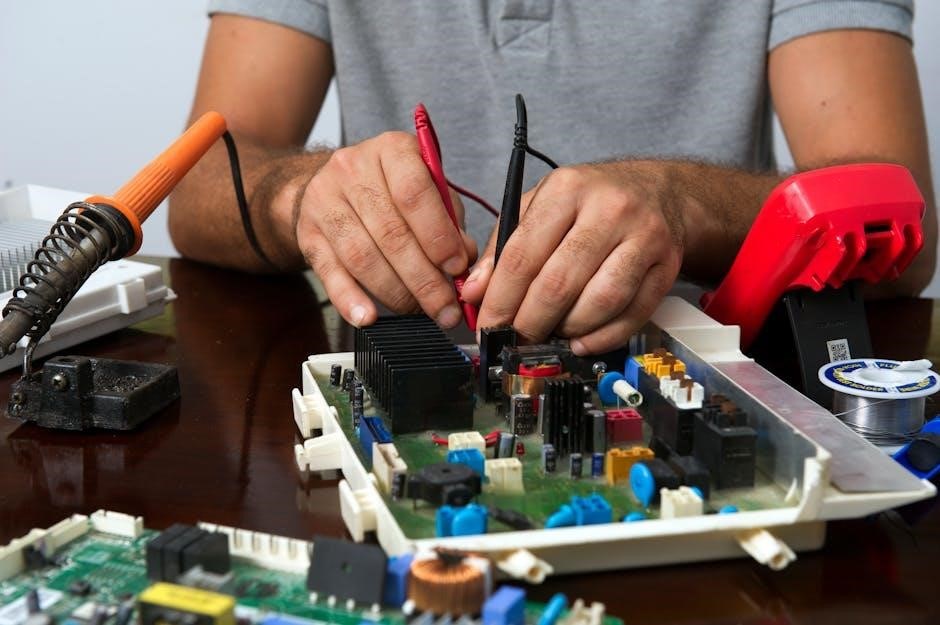
Checking the Blower Motor Capacitor
The blower motor capacitor provides the necessary jolt to start the motor, and its failure is a frequent cause of blower issues. Before handling, ALWAYS disconnect power to the furnace! Locate the capacitor – typically a cylindrical component near the blower motor.
Visually inspect for physical damage like bulging, cracking, or leaking fluids. Use a multimeter set to capacitance to test the capacitor’s microfarad (µF) rating. Compare the reading to the value printed on the capacitor itself. A significant deviation indicates a faulty capacitor needing replacement. Remember to discharge the capacitor before handling, even after power is off, for safety.
Testing the Blower Motor Itself
After verifying the capacitor and power supply, directly test the blower motor to confirm its functionality. Ensure power is disconnected before proceeding! Visually inspect the motor for any signs of damage, such as burnt wiring or a seized shaft.
Using a multimeter set to ohms, check the motor windings for continuity. A reading of zero or infinite resistance indicates a faulty winding. Carefully spin the blower wheel by hand; it should rotate freely. If it’s stiff or makes grinding noises, the motor bearings may be worn. If the motor fails these tests, replacement is necessary. Always consult the Goodman furnace’s wiring diagram for proper testing procedures.
Problem 4: Thermostat Issues
Thermostat malfunctions are a frequent cause of furnace problems, often misdiagnosed as internal heating system failures. Begin by ensuring the thermostat has fresh batteries, even if it appears to be displaying information. Verify the thermostat is set to “Heat” and the desired temperature is higher than the room temperature.
Incompatibility between the thermostat and the furnace can also cause issues; confirm compatibility using Goodman’s documentation. Inspect the thermostat wiring for loose connections or corrosion. A faulty thermostat can send incorrect signals, preventing the furnace from operating correctly. Consider temporarily bypassing the thermostat with a jumper wire (with power off!) to test if the furnace responds, indicating a thermostat problem.
Thermostat Compatibility
Ensuring thermostat compatibility with your Goodman furnace is crucial for optimal performance. Modern, “smart” thermostats aren’t always universally compatible with older furnace models. Specifically, electronic thermostats, like those with the same model number used in multiple units, require careful consideration.
Check Goodman’s official website or the furnace’s documentation for a list of compatible thermostat models. Incompatible thermostats may not correctly control all furnace functions, leading to issues like short cycling or failure to ignite. Pay attention to voltage requirements – a mismatch can damage the furnace or thermostat. If upgrading, choose a thermostat specifically designed for gas furnaces and verify it supports all necessary features.
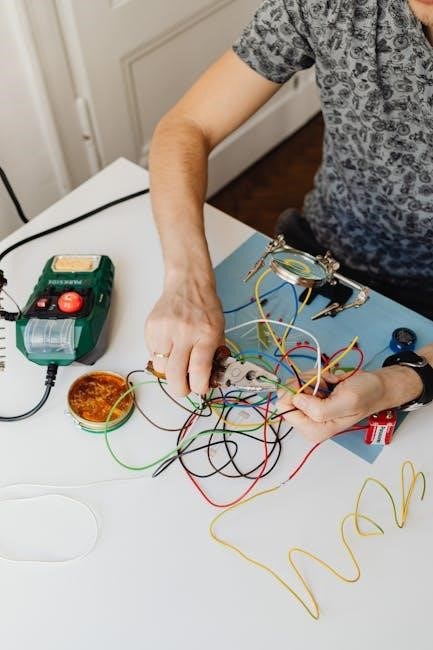
Thermostat Wiring Problems
Incorrect thermostat wiring is a frequent cause of Goodman furnace malfunctions. Carefully inspect the wiring connections at both the thermostat and the furnace control board. Loose connections, corroded wires, or mislabeled terminals can disrupt the communication between the thermostat and the furnace.
Always power off the furnace at the breaker before inspecting wiring. Refer to the wiring diagram specific to your furnace model – these are often found inside the furnace access panel. Ensure each wire is securely connected to the correct terminal. Common issues include swapped R and C wires, or a disconnected common wire. If unsure, consult a qualified HVAC technician to avoid damaging the system.
Problem 5: Error Codes and What They Mean
Goodman furnaces utilize error codes to signal specific malfunctions, simplifying the diagnostic process. These codes are displayed on the furnace control board or the thermostat, depending on the model. Understanding these codes is crucial for efficient troubleshooting.
Refer to your furnace’s technical documentation for a complete list of error codes and their corresponding meanings. Common codes relate to flame rollout, high limit switch activation, or issues with the gas valve. Documenting the error code before attempting any repairs is essential. Some codes may indicate a need for professional service, particularly those related to gas supply or safety components.
Decoding Goodman Furnace Error Codes
Successfully decoding Goodman furnace error codes requires a systematic approach. Begin by noting the exact code displayed – even slight variations can indicate different problems. Consult the furnace’s specific technical manual; these manuals contain detailed code explanations.
Online resources and forums can also provide assistance, but always verify information against official Goodman documentation. Codes often point to specific components, like the flame sensor, pressure switch, or igniter. Understanding the code’s meaning allows for targeted troubleshooting, saving time and preventing unnecessary repairs; Remember safety first – if unsure, contact a qualified HVAC technician.
Accessing Error Code History
Many modern Goodman furnaces store a history of recent error codes, providing valuable insight into intermittent problems. Accessing this history typically involves navigating the furnace’s control board menu using a specific sequence of button presses. Refer to your furnace’s technical manual for the exact procedure, as it varies by model.
The control board display will then show a log of past errors, often including timestamps. Analyzing this history can reveal patterns, such as recurring issues or errors that occur under specific conditions. This information is crucial for accurate diagnosis and can help pinpoint the root cause of the problem, leading to a more effective repair.
Routine Maintenance for Goodman Furnaces
Consistent routine maintenance is vital for optimal performance and longevity of your Goodman furnace. Regularly replacing the air filter – typically every 1-3 months – prevents dust buildup and ensures efficient airflow. Annual cleaning of the burner assembly removes debris and promotes clean combustion.
A professional inspection, ideally before each heating season, is highly recommended. Technicians can identify potential issues, such as gas leaks or carbon monoxide risks, and perform necessary adjustments. Proper maintenance minimizes the likelihood of breakdowns, reduces energy consumption, and extends the life of your heating system, saving you money in the long run.
Air Filter Replacement
Replacing your Goodman furnace’s air filter is the simplest, yet most impactful, maintenance task. A dirty filter restricts airflow, forcing the furnace to work harder, reducing efficiency, and potentially causing overheating. Filters should be checked monthly and replaced every 1-3 months, depending on usage and air quality.
Turn off the furnace before changing the filter. Locate the filter compartment, usually near the blower motor. Note the filter’s size and airflow direction (indicated by an arrow). Remove the old filter and insert the new one, ensuring the arrow points in the correct direction. Regular filter changes contribute to cleaner air and a healthier home environment.
Cleaning the Burner Assembly
Regular cleaning of the burner assembly is crucial for optimal furnace performance and safety. Over time, soot and debris can accumulate, hindering proper combustion and potentially leading to carbon monoxide production. Always disconnect power to the furnace before attempting any cleaning.
Carefully remove the burner assembly components, following the manufacturer’s instructions. Use a vacuum cleaner with a brush attachment to gently remove loose debris. For stubborn buildup, a soft brush and mild detergent solution can be used, ensuring thorough rinsing and drying before reassembly. Inspect the burners for any signs of corrosion or damage, replacing them if necessary. Professional cleaning is recommended annually.
Professional Inspection Schedule
While DIY maintenance is valuable, regular professional inspections are vital for long-term Goodman furnace health. A yearly inspection by a qualified HVAC technician ensures comprehensive system evaluation, identifying potential issues before they escalate into costly repairs.
Technicians will assess gas pressure, combustion efficiency, and electrical connections, verifying safe and optimal operation. They’ll also inspect the heat exchanger for cracks or corrosion, a critical safety component. Consider a bi-annual inspection if your furnace experiences heavy usage or if you have concerns about air quality. Document all service visits, maintaining a record of maintenance and repairs for warranty purposes.
Locating Replacement Parts
When repairs are necessary, sourcing the correct replacement parts is crucial for a successful fix. Repair Clinic and other online suppliers offer a vast inventory of Goodman furnace components, often with same-day shipping and generous return policies.
Always have your furnace’s model number readily available; this ensures you order compatible parts. The model number is typically found on a sticker located inside the furnace’s access panel. Cross-reference the part number with the supplier’s database to confirm compatibility. Beware of generic parts; Goodman-specific components often provide superior performance and longevity. Consider local HVAC supply stores for immediate needs and expert advice.
Repair Clinic and Other Suppliers
Repair Clinic stands out as a prominent online retailer specializing in appliance and HVAC parts, including a comprehensive selection for Goodman furnaces. They boast a price match guarantee and a 365-day return policy, offering peace of mind to DIYers.
Beyond Repair Clinic, consider other reputable suppliers like AppliancePartsPros and Sears PartsDirect. Amazon and eBay also host numerous sellers offering Goodman furnace components, but verify seller ratings and part compatibility carefully. Local HVAC wholesalers often cater to professionals but may also sell to the public. Compare pricing and shipping costs across multiple vendors before making a purchase.
Using Model Numbers to Find Correct Parts
Accurate identification of your Goodman furnace’s model number is crucial for sourcing the correct replacement parts. This number is typically found on the unit’s nameplate, usually located inside the access panel. Record the complete model number, including all letters and digits, as even slight variations can signify incompatible parts.
When searching online or contacting suppliers, always use the full model number. Many parts websites have search functions specifically designed for model number input. Cross-reference the part number with the furnace’s technical documentation if available. Double-check compatibility before finalizing your order to avoid costly returns and delays.
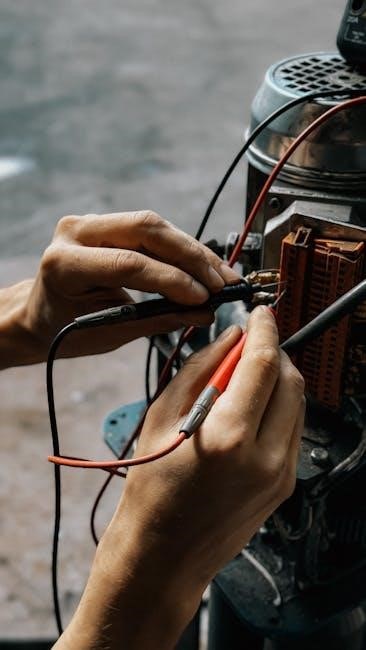
Advanced Troubleshooting Techniques
For complex issues, employing advanced diagnostic methods is often necessary. Utilizing a multimeter for electrical testing allows you to verify voltage, continuity, and resistance within the furnace’s circuits, pinpointing faulty wiring or components. Carefully follow safety precautions when working with electricity.
Draft inducer motor diagnostics are critical for combustion efficiency. Check for proper voltage supply and ensure the motor spins freely. Inspect the vent pipe for obstructions. A malfunctioning draft inducer can cause incomplete combustion and safety hazards. Remember to consult a qualified technician if you are uncomfortable performing these tests.
Using a Multimeter for Electrical Testing
A multimeter is an invaluable tool for diagnosing electrical faults within your Goodman furnace. Before use, ensure the furnace is de-energized at the breaker. Start by checking voltage at key components like the transformer, igniter, and motor, comparing readings to the manufacturer’s specifications.
Continuity testing verifies unbroken circuits in wiring and switches. Resistance measurements help identify faulty heating elements or coils. Always use the correct range setting on the multimeter. Exercise extreme caution when working with live circuits; if unsure, consult a qualified HVAC technician. Proper technique ensures accurate readings and safe troubleshooting.
Draft Inducer Motor Diagnostics
The draft inducer motor is crucial for venting combustion gases safely. A failing motor often presents as a furnace that starts but shuts down quickly. Visually inspect the motor for obstructions or damage. Use a multimeter to check for voltage at the motor terminals when the furnace calls for heat; no voltage indicates a control board issue.
Listen for unusual noises like grinding or squealing. If the motor spins freely but slowly, the capacitor may be failing. Carefully test the capacitor with a multimeter designed for capacitance measurement. Replacement is often straightforward, but ensure proper wiring. A properly functioning draft inducer is vital for safe furnace operation.
Resources for Goodman Furnace Owners
Goodman’s official website (https://www.goodmanmfg.com/) is the primary source for manuals, warranty information, and frequently asked questions. It also offers a dealer locator to find qualified service technicians in your area. For peer-to-peer support and shared experiences, numerous online forums and communities exist, providing a platform to discuss specific issues and potential solutions.
Websites like Repair Clinic (https://www.repairclinic.com/) offer a vast catalog of Goodman replacement parts with detailed diagrams. Home Improvement Stack Exchange (https://homeimprovement.stackexchange.com/) features discussions on HVAC troubleshooting. These resources empower owners to understand their systems and address problems effectively.
Goodman Official Website
The Goodman Manufacturing website (https://www;goodmanmfg.com/) serves as the central hub for all official Goodman furnace information. Here, owners can access comprehensive product manuals, including detailed troubleshooting guides specific to their model. Warranty registration and verification are easily managed through the site, ensuring coverage for potential repairs.
A robust “Find a Dealer” tool connects users with authorized Goodman service technicians in their locality, facilitating professional assistance when needed. The website also features a frequently asked questions (FAQ) section addressing common concerns. Downloading energy efficiency guides and exploring rebate programs are additional benefits, promoting cost savings and responsible operation.
Online Forums and Communities
Numerous online forums and communities offer valuable peer-to-peer support for Goodman furnace owners facing troubleshooting challenges. Platforms like DoItYourself.com’s HVAC forum (https://www.doityourself.com/forum/heating-cooling/goodman-gas-furnace-troubleshooting-64477/) and Home Improvement Stack Exchange provide a space to ask questions, share experiences, and receive advice from experienced DIYers and professionals.
These communities often contain threads dedicated to specific Goodman models and common issues, offering targeted solutions. Searching archived discussions can reveal fixes for previously encountered problems. However, always exercise caution and verify information before attempting repairs, prioritizing safety and consulting qualified technicians when necessary.